
Braelinn Course
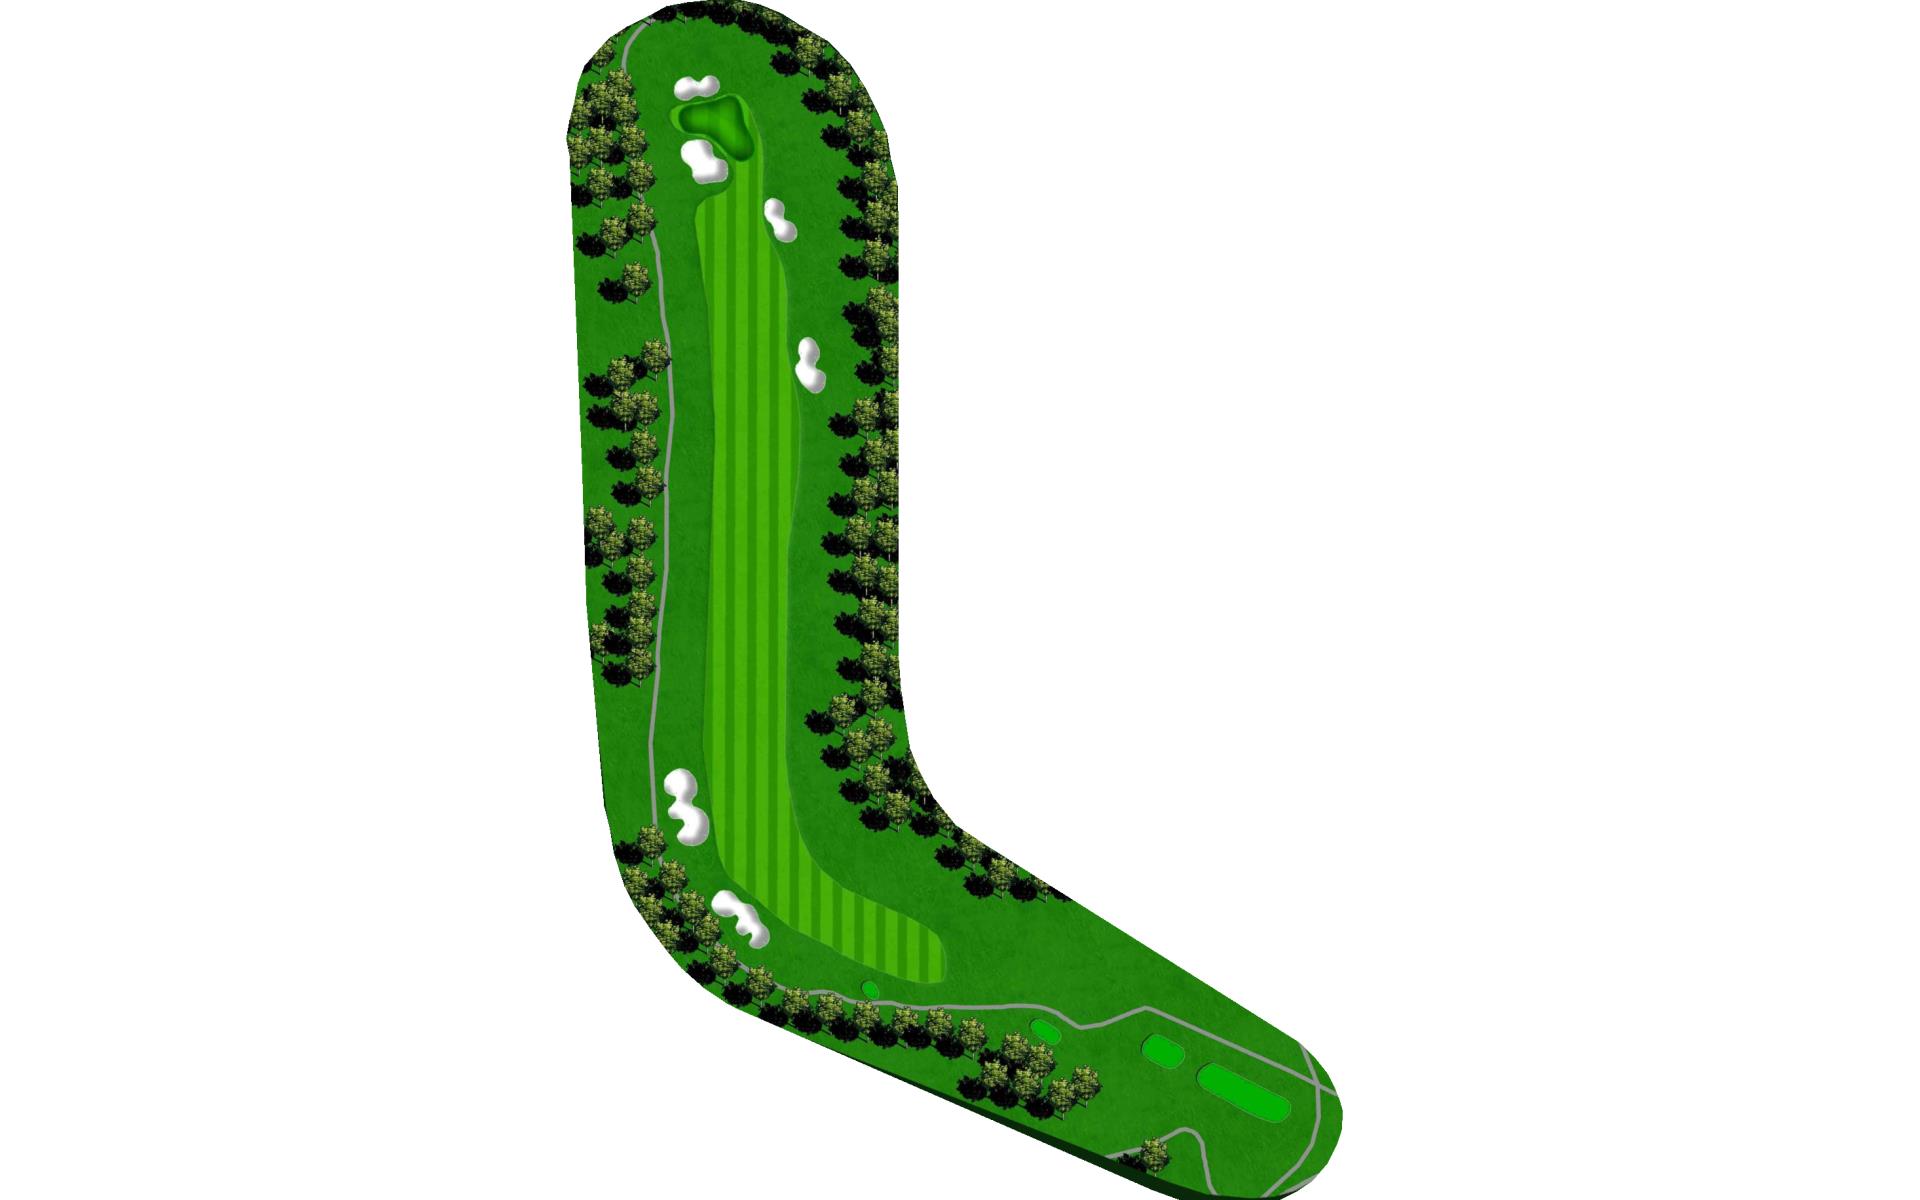
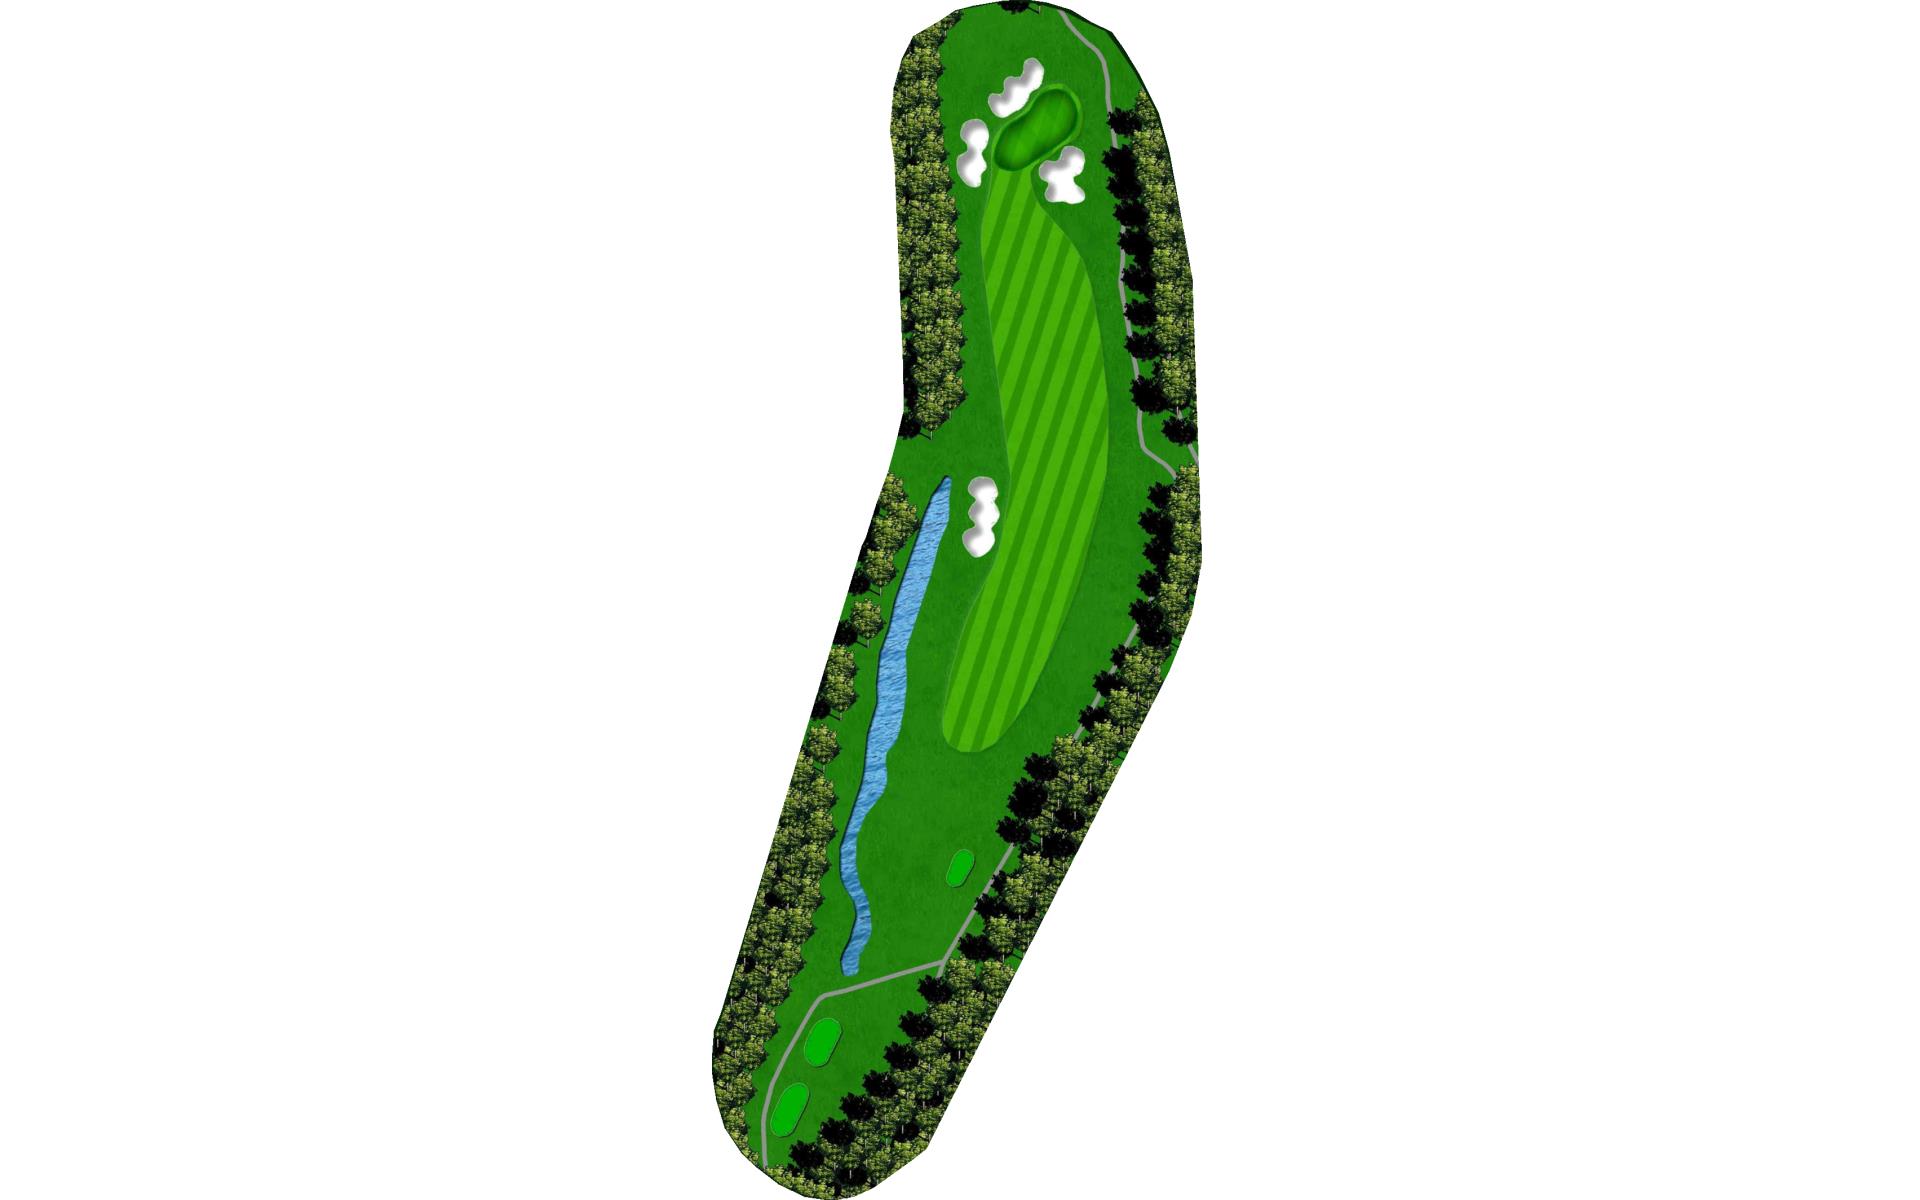
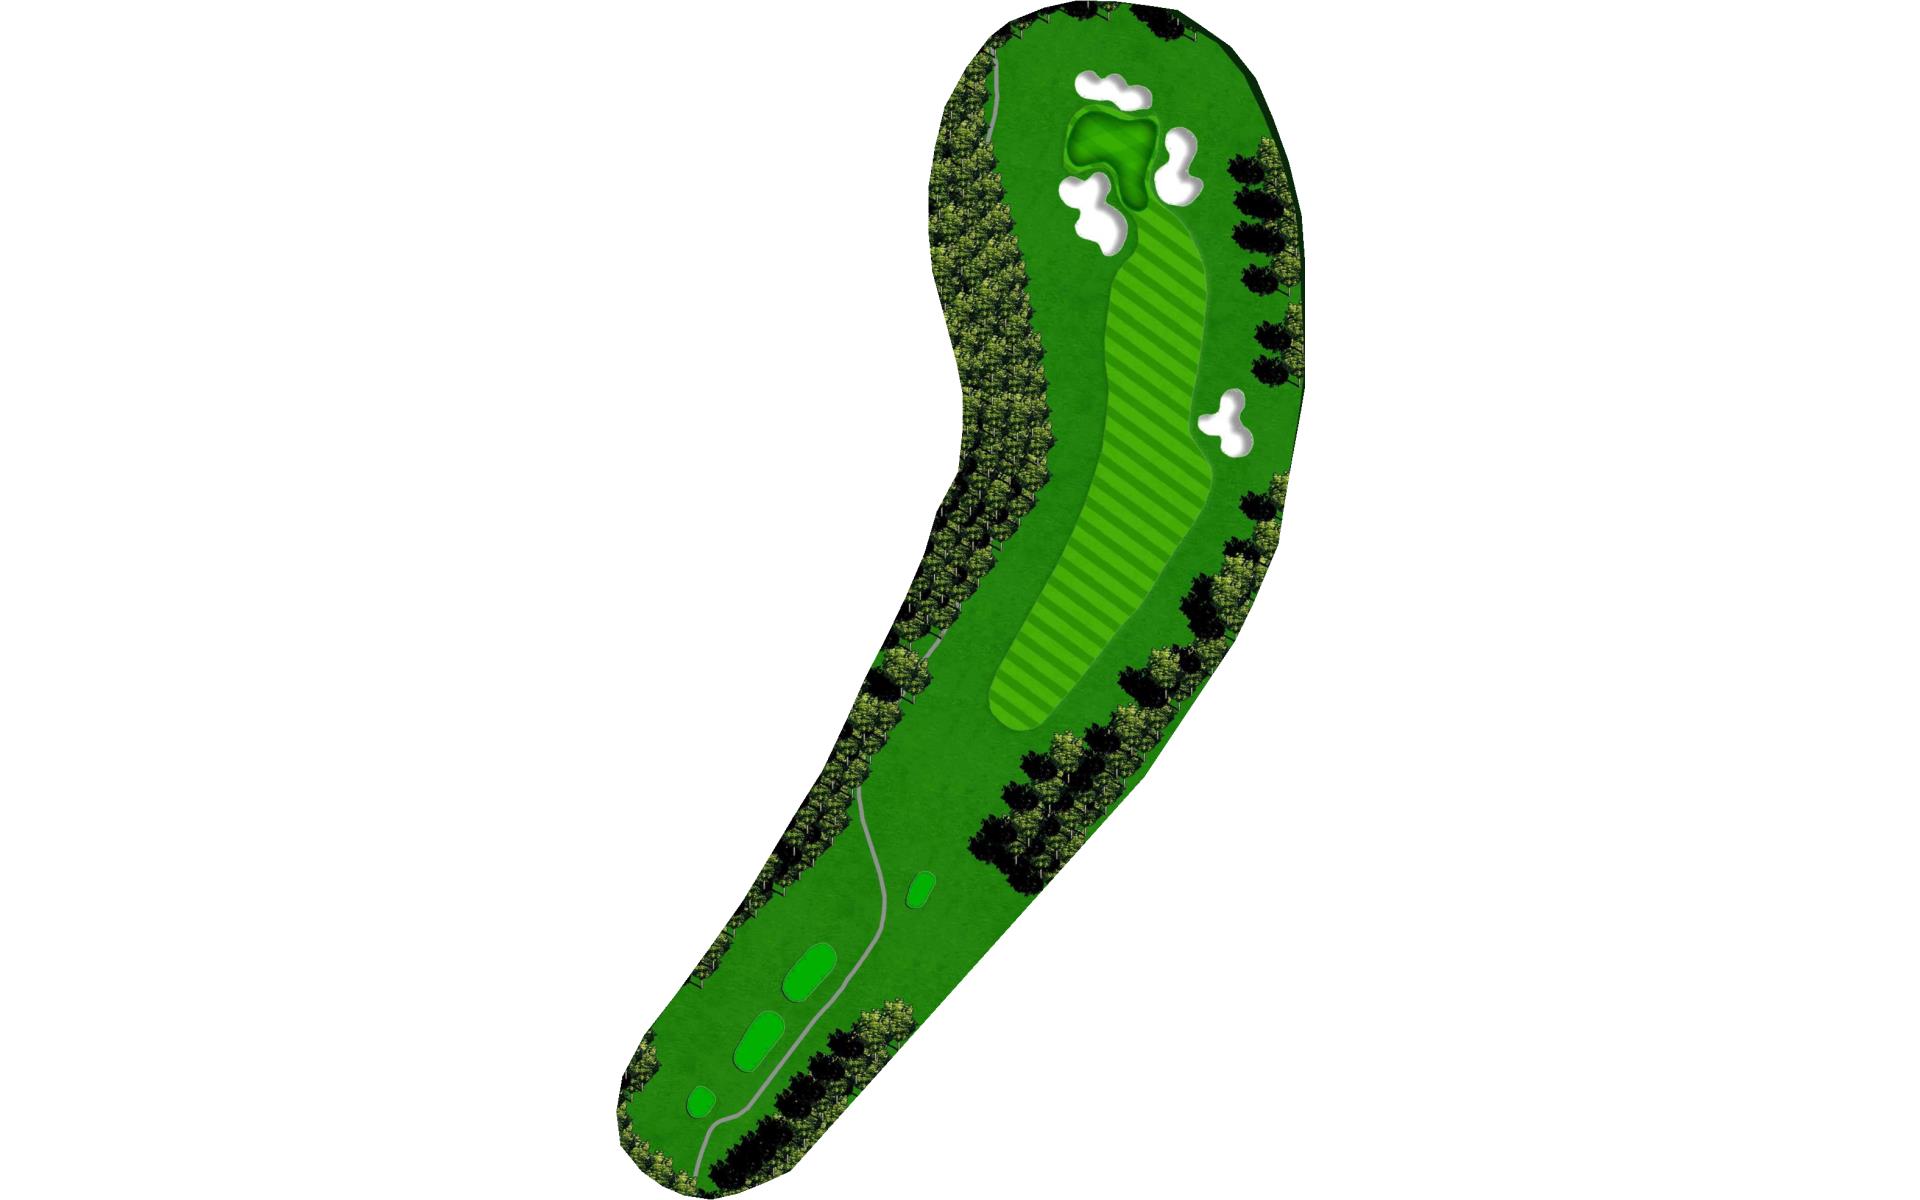
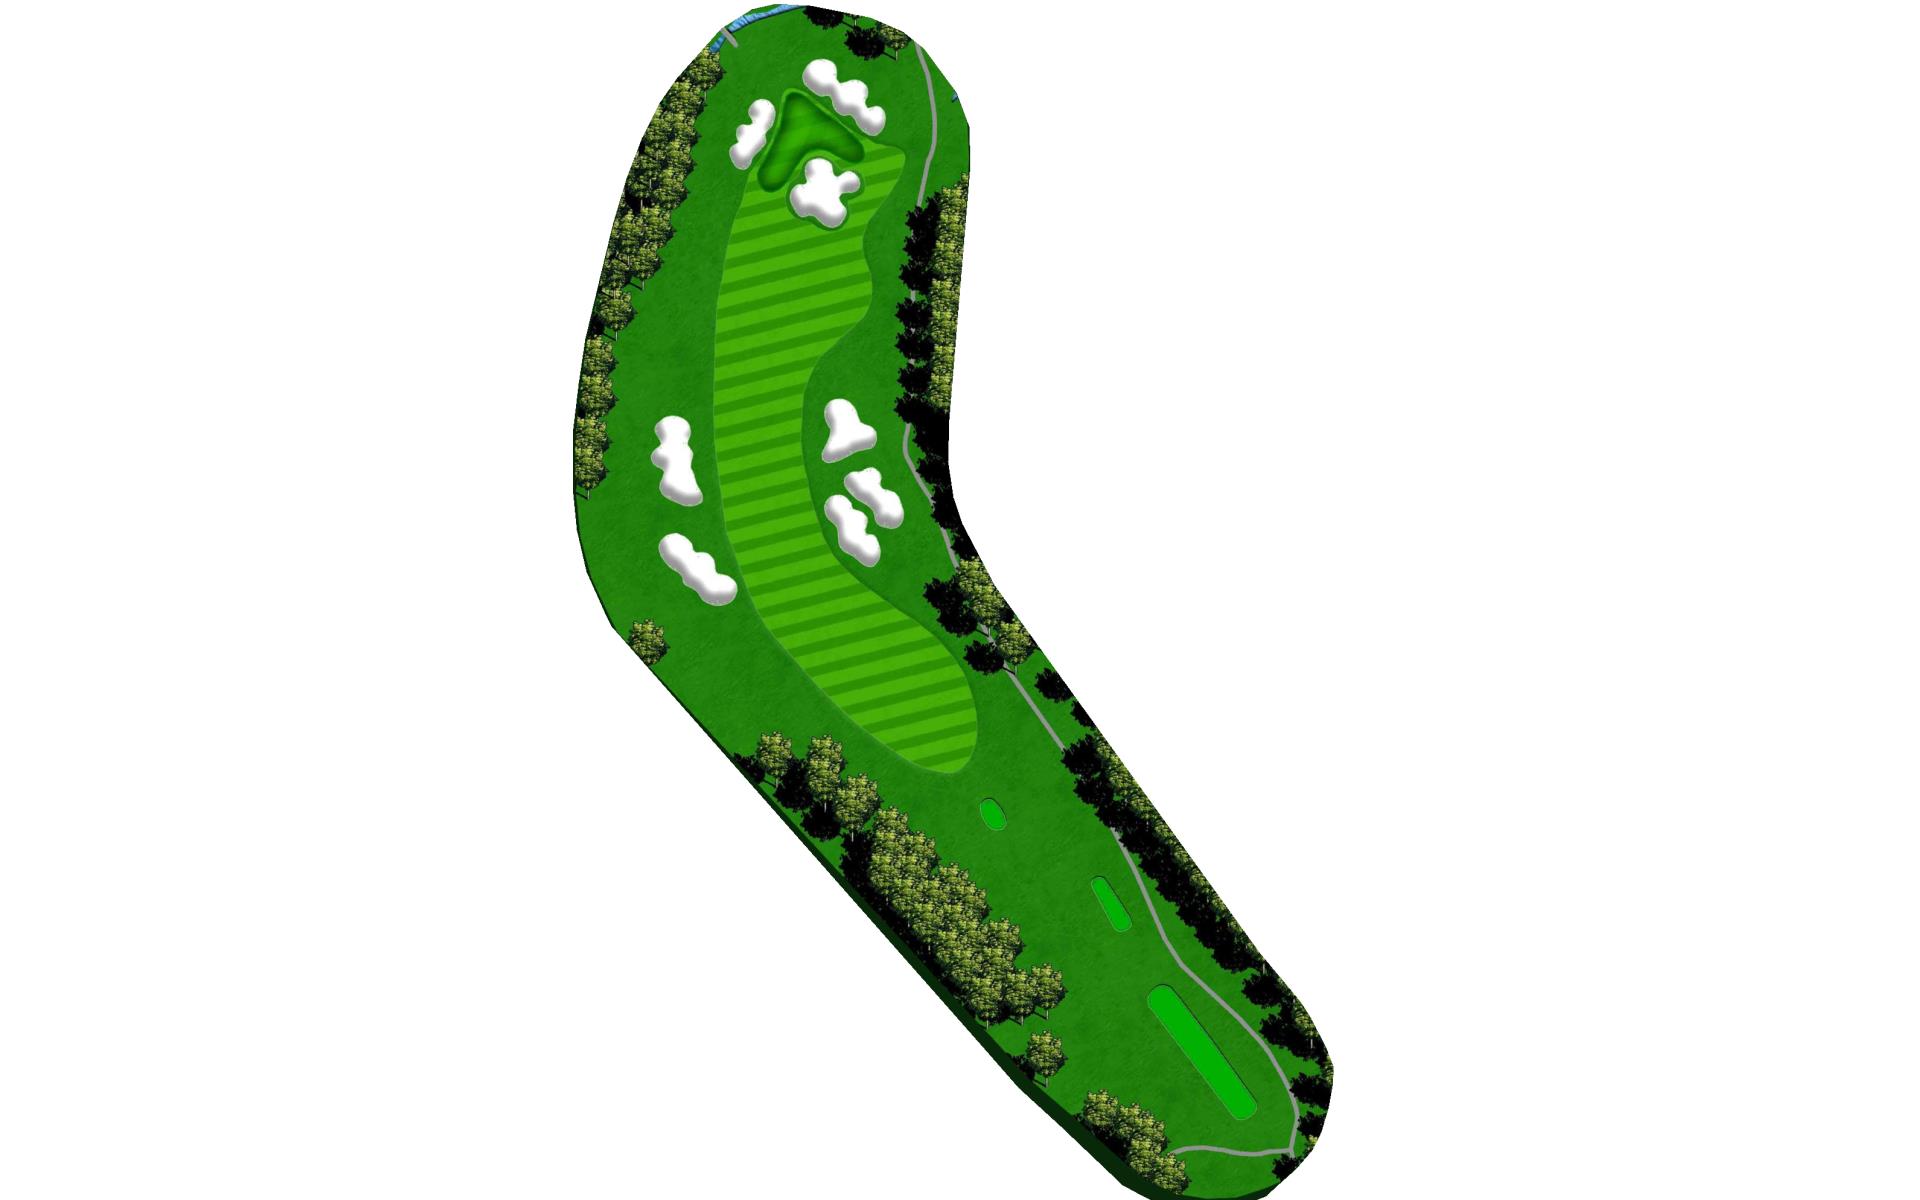
# 1 / Hole #1
Par: 5
Yardage by Tee:
BLACK 554
BLUE 533
GOLD 458
RED 383
WHITE 507
GREEN 458
Pro Tips
For this dogleg right hole, with a green protected by bunkers, it’s all about the approach.

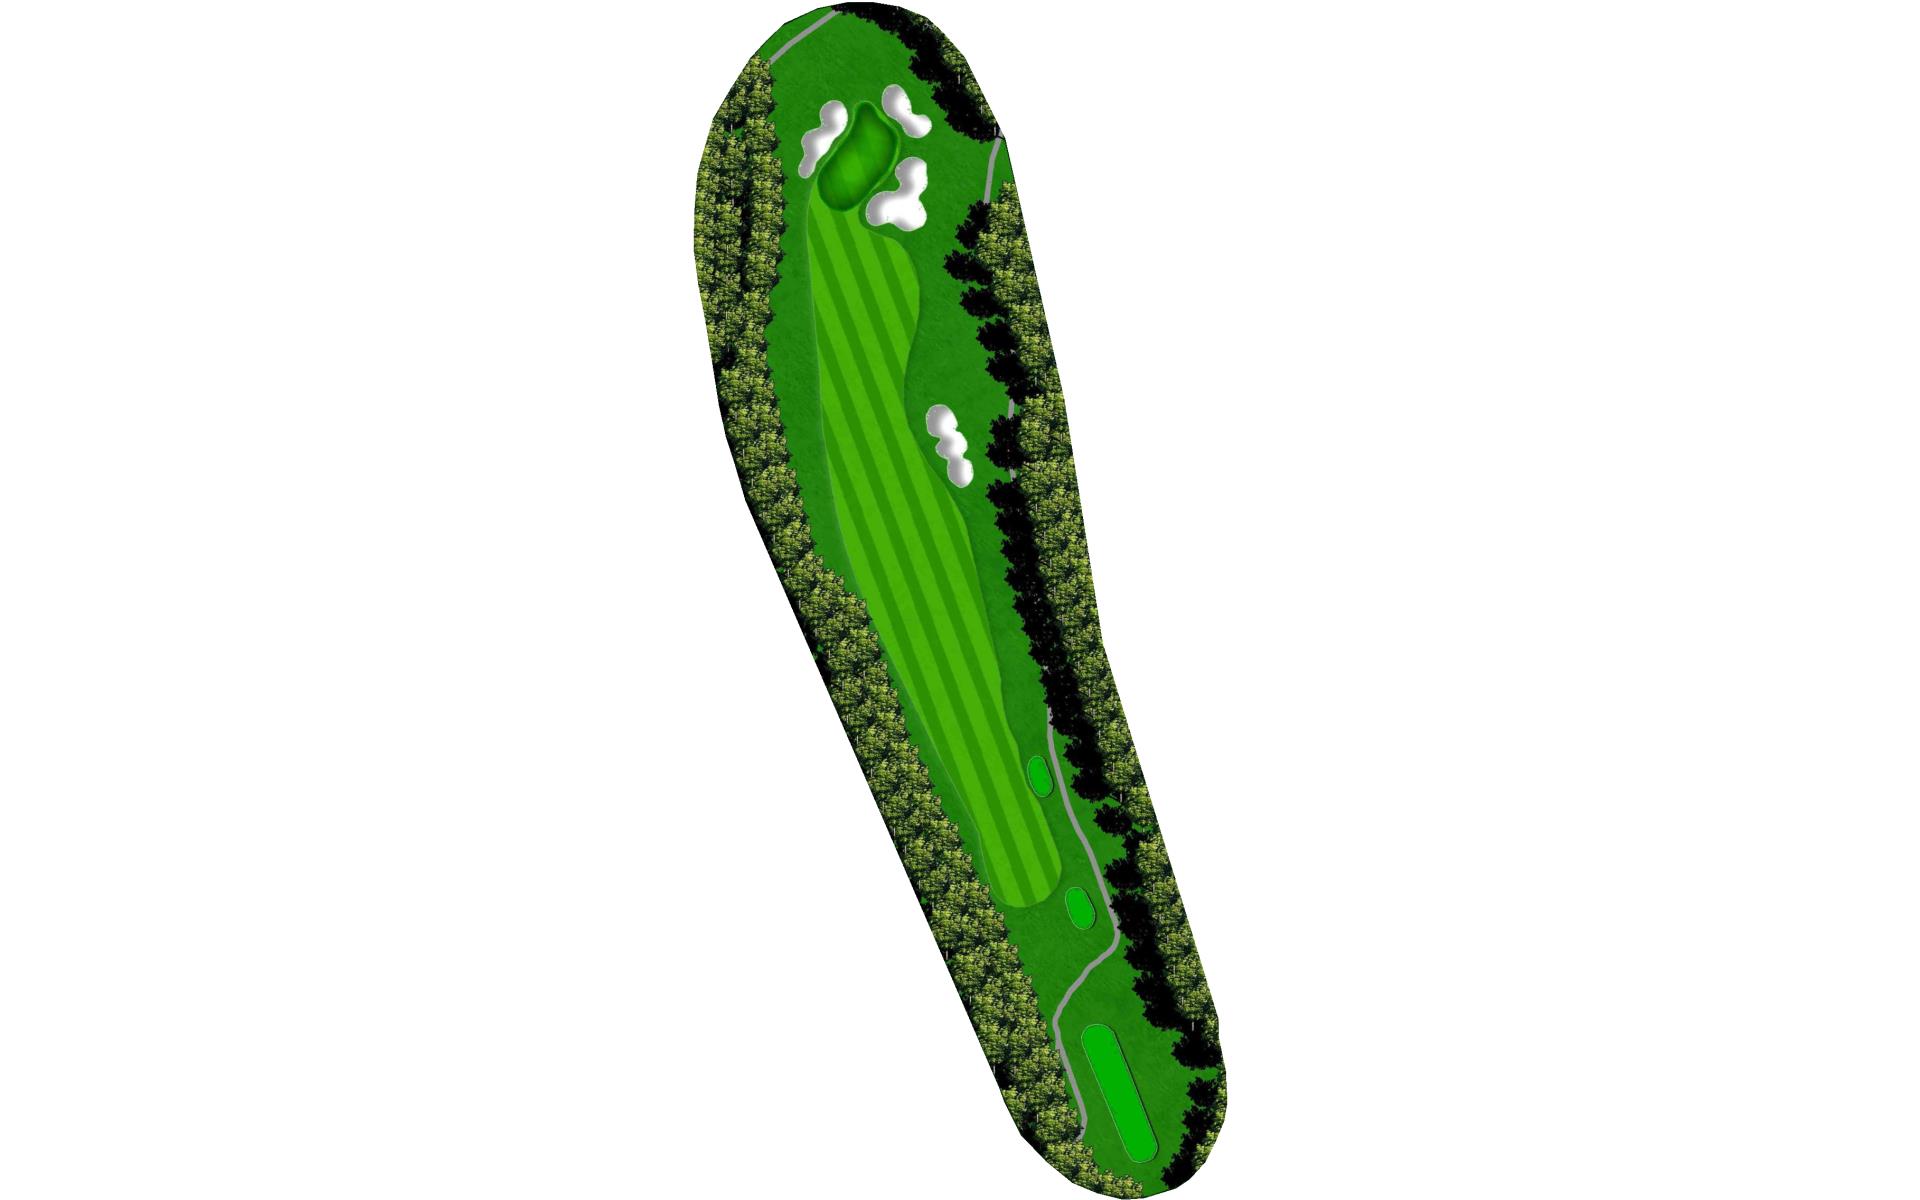
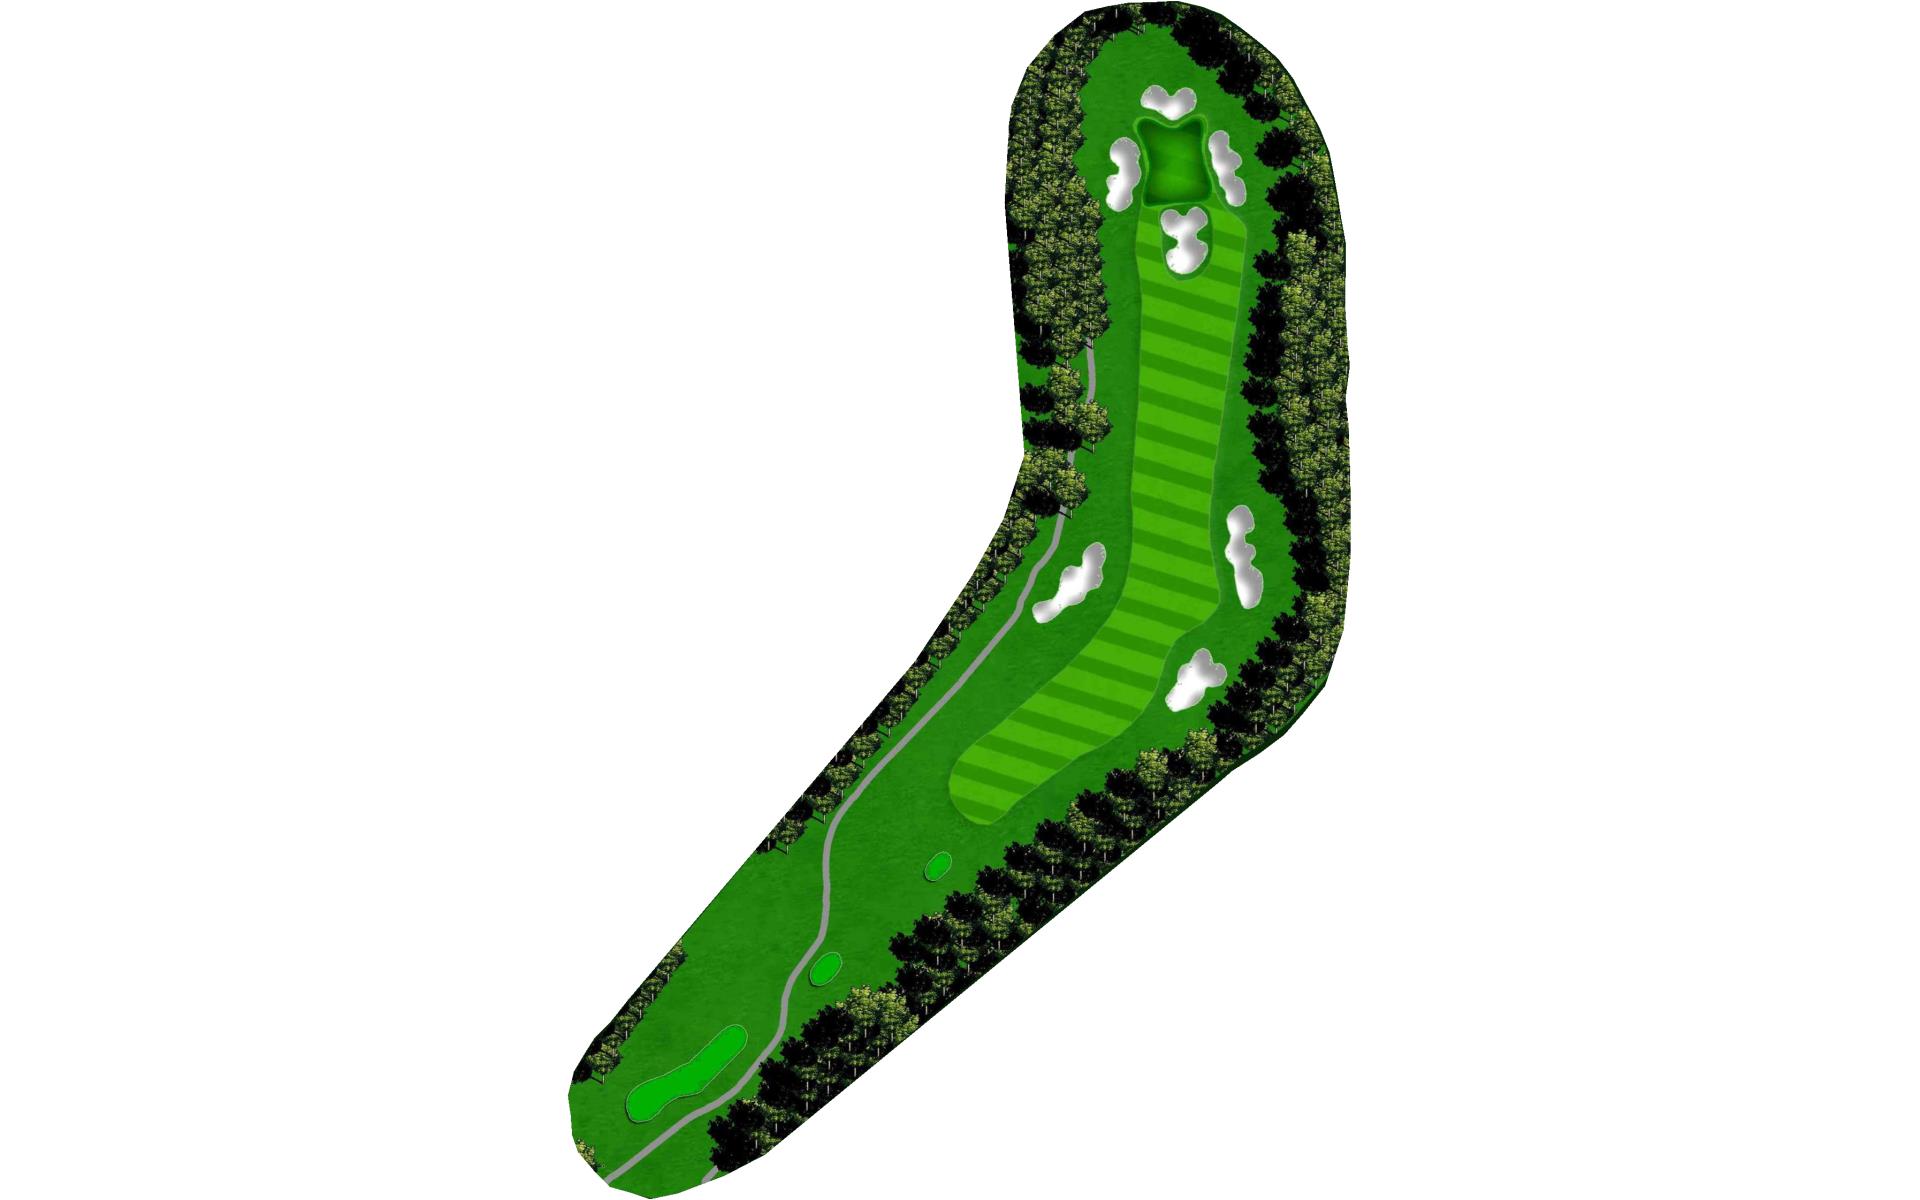
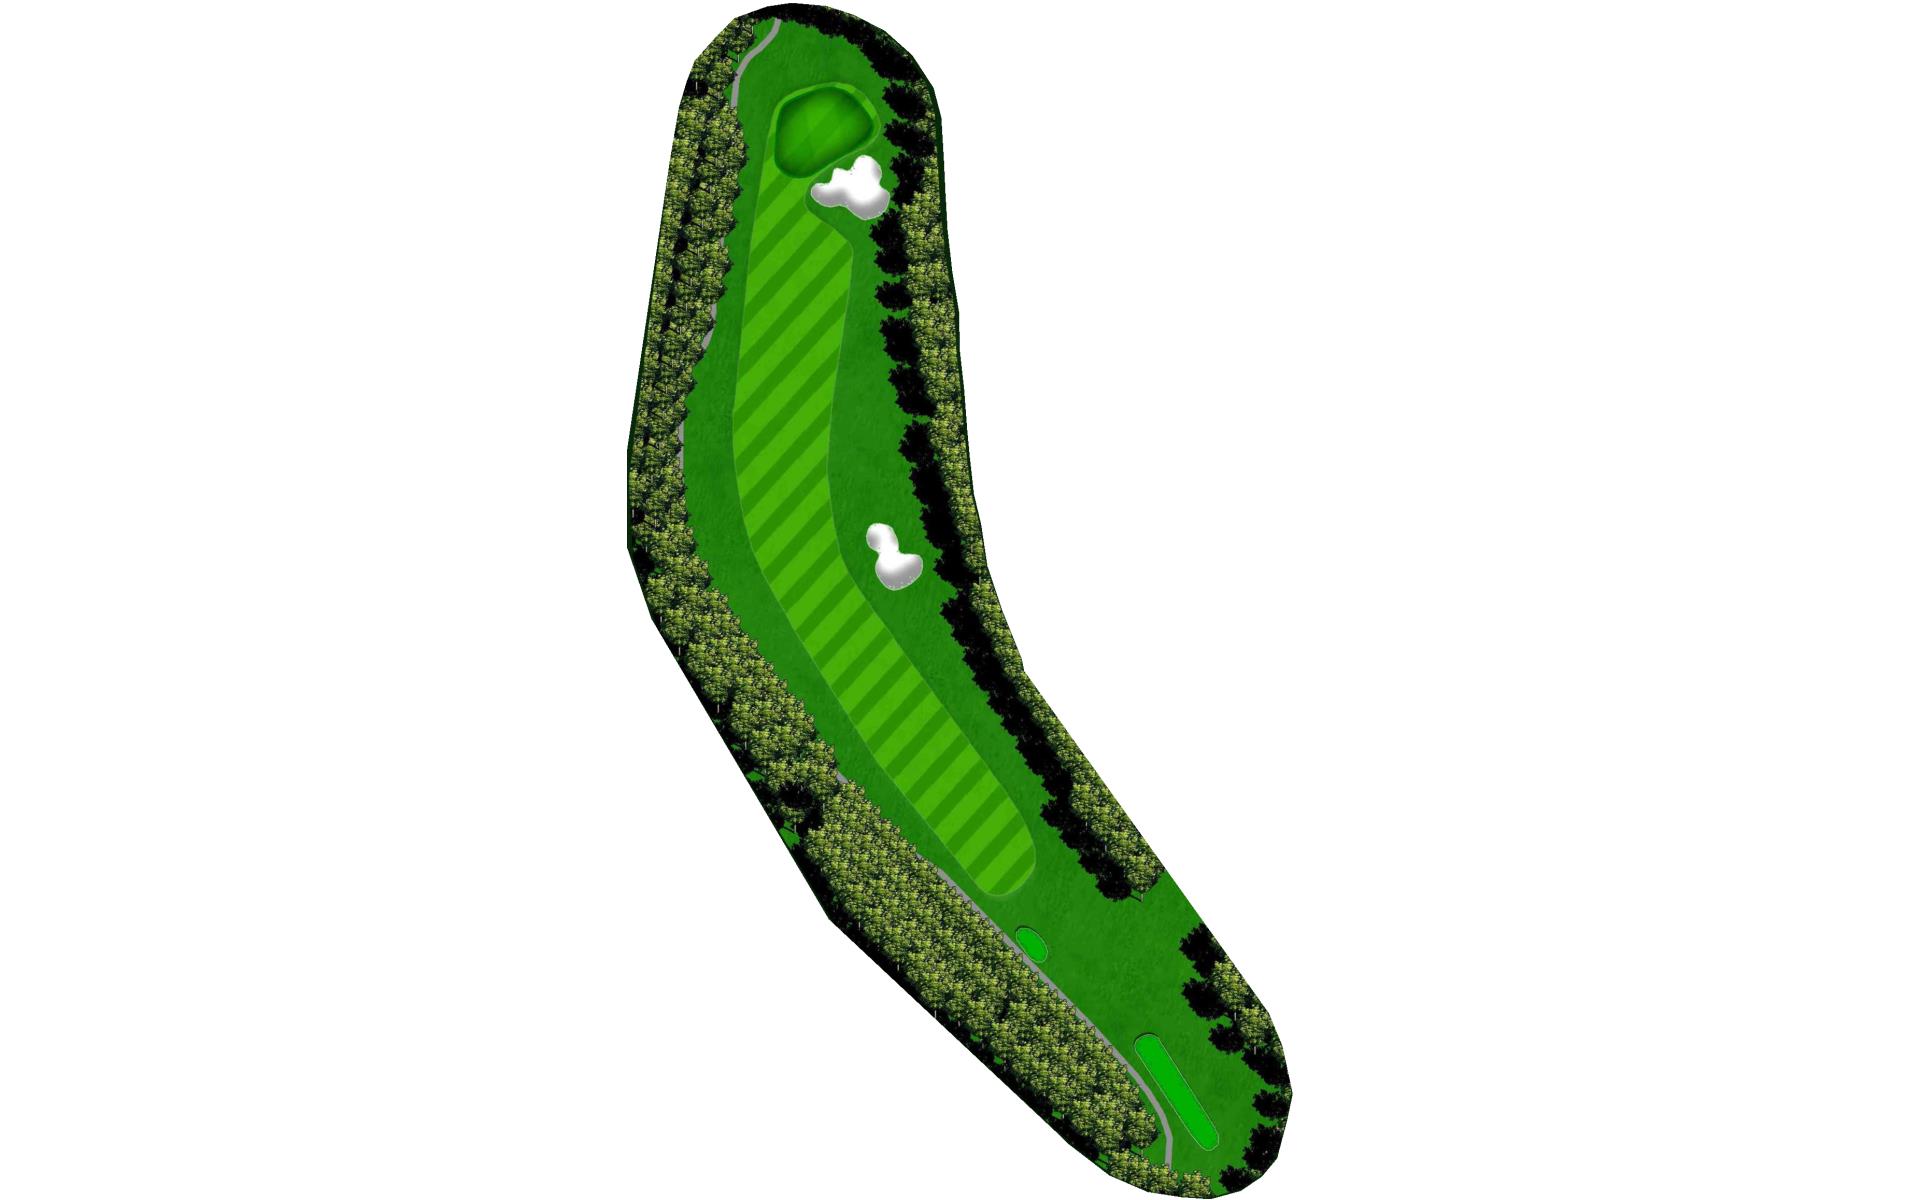
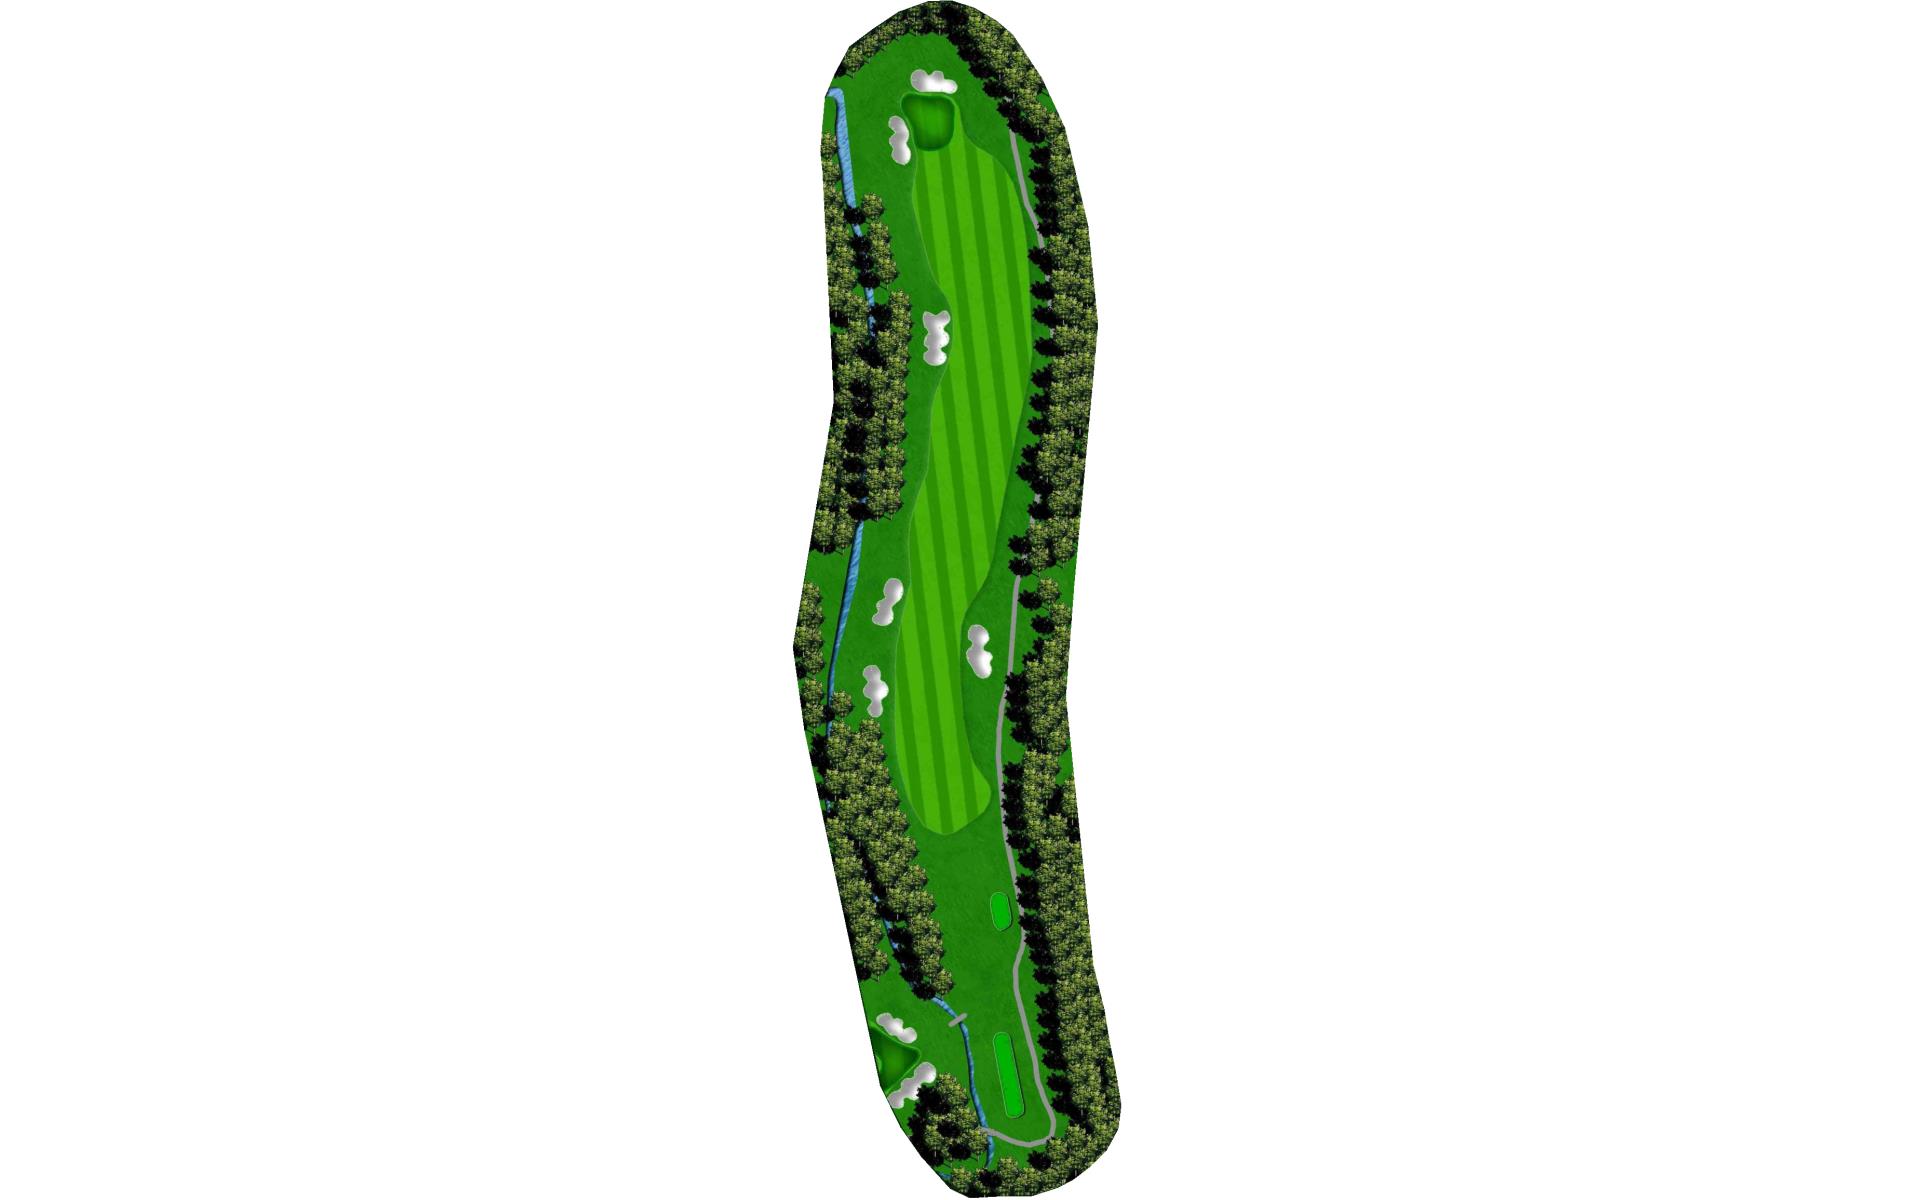
# 2 / Hole #2
Par: 4
Yardage by Tee:
BLACK 420
BLUE 403
GOLD 282
RED 270
WHITE 387
GREEN 387
Pro Tips
A long par 4 with a difficult approach over water; make sure you clear the water.

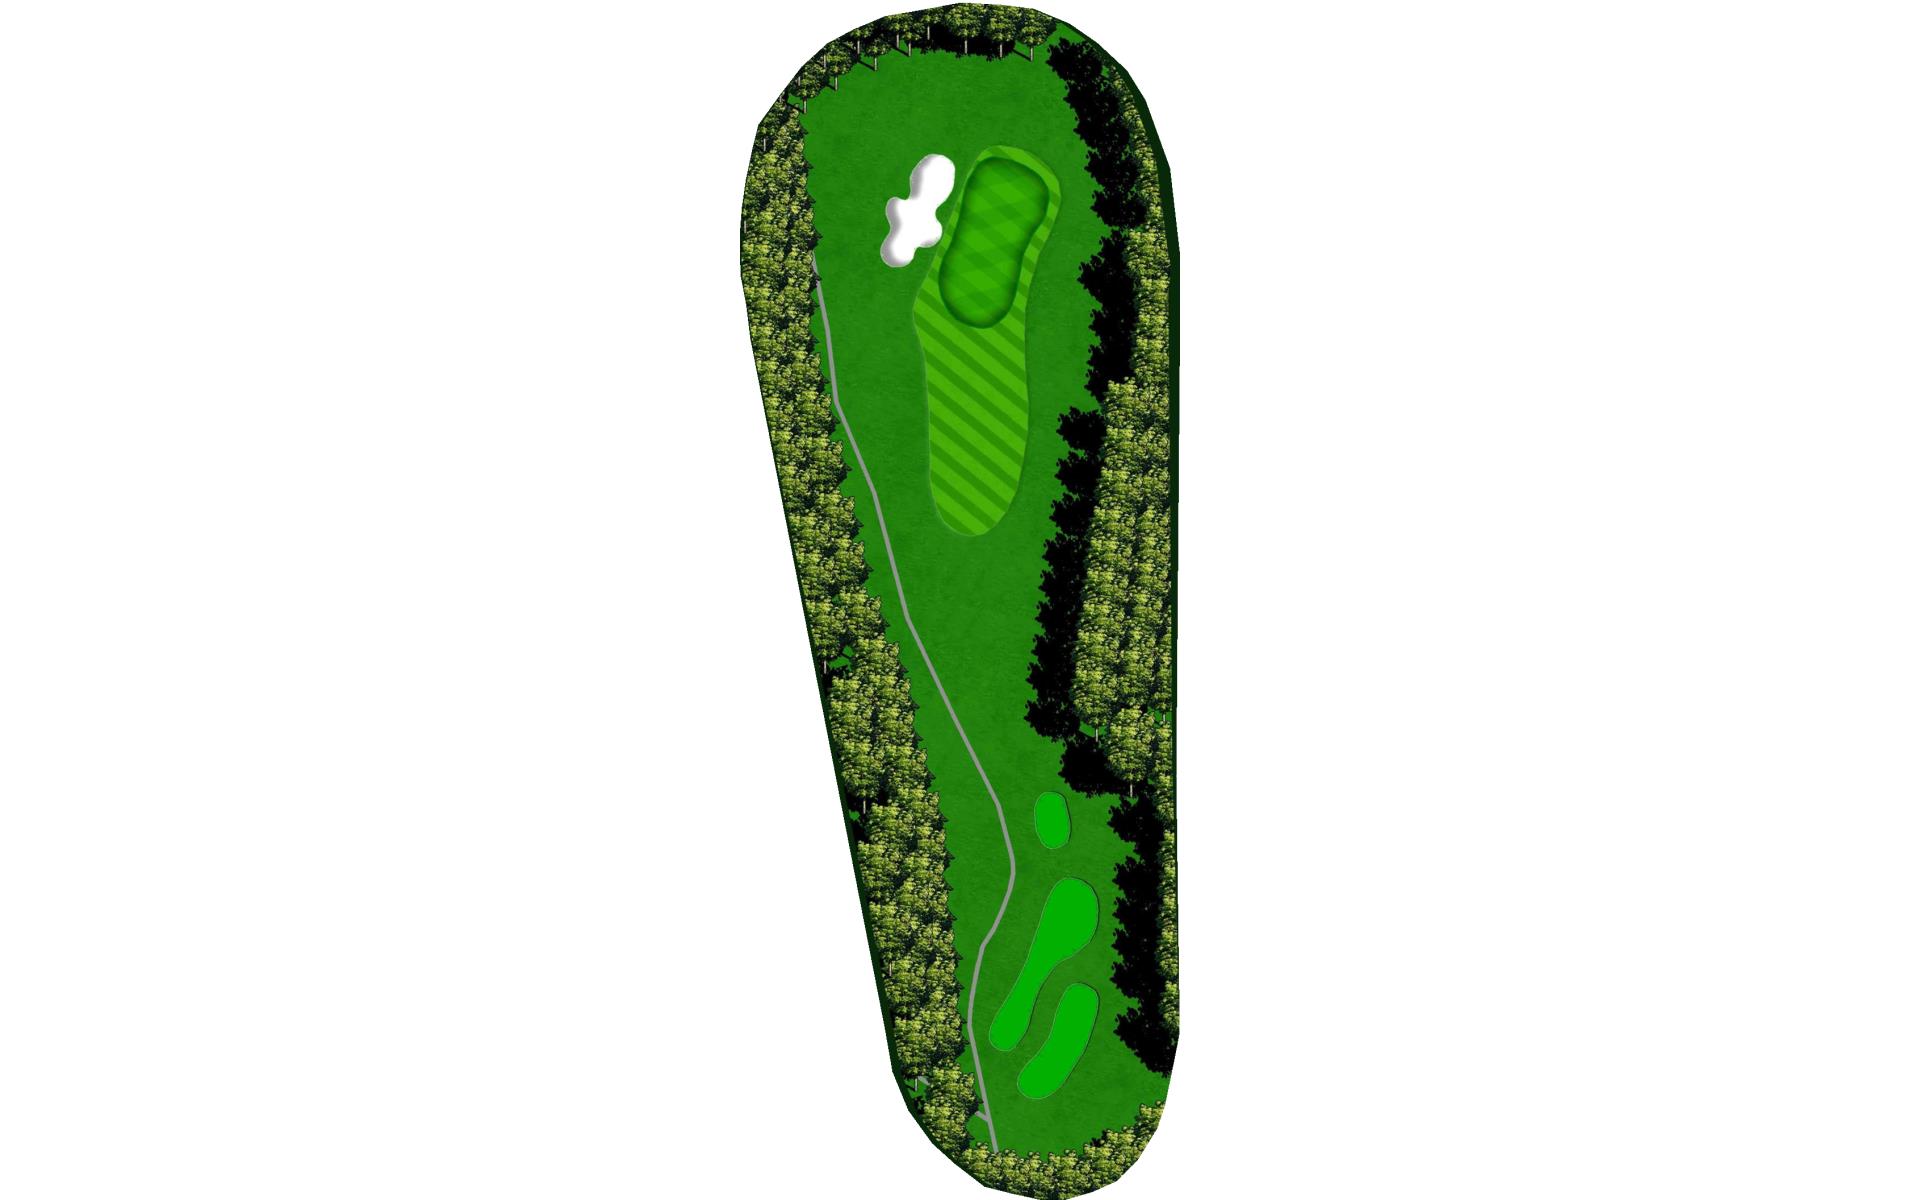
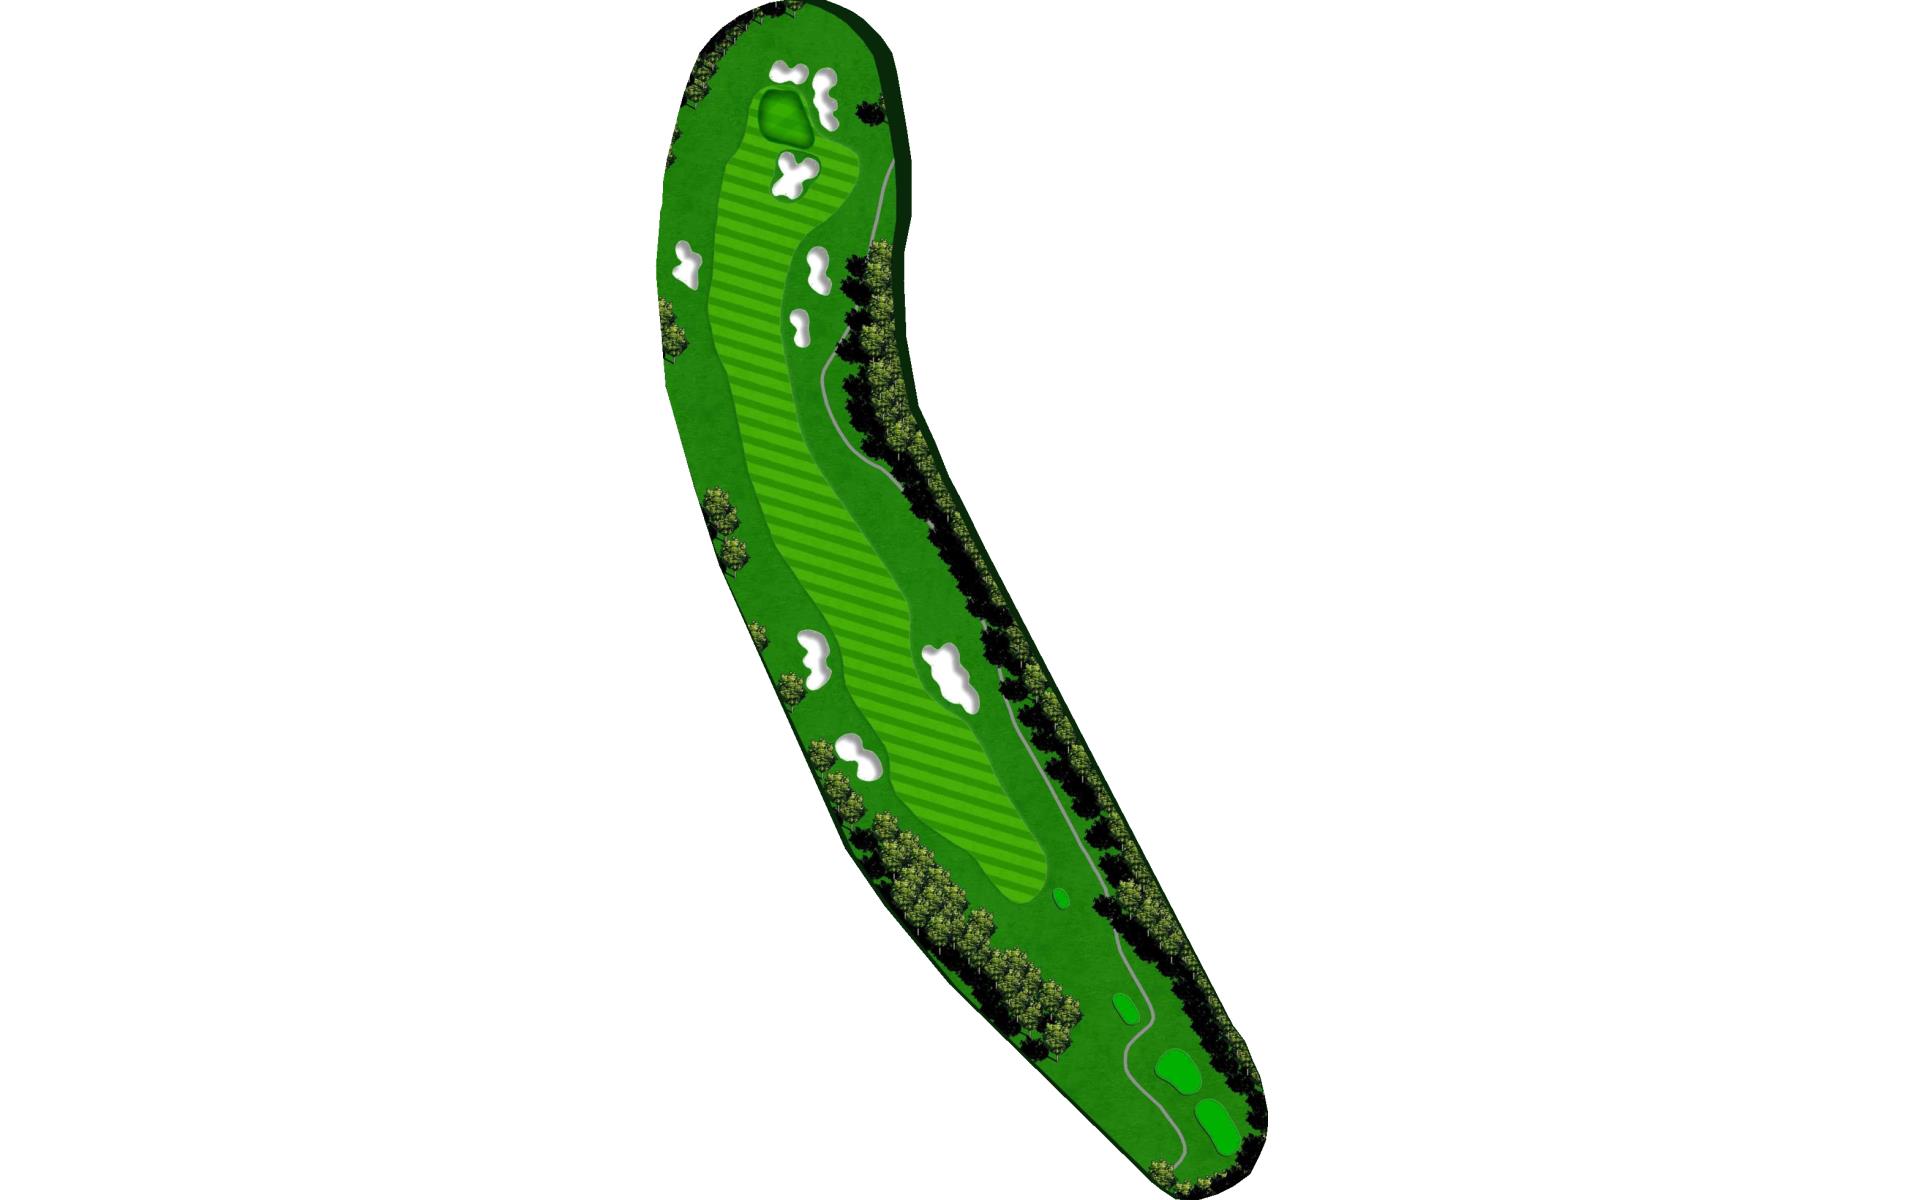
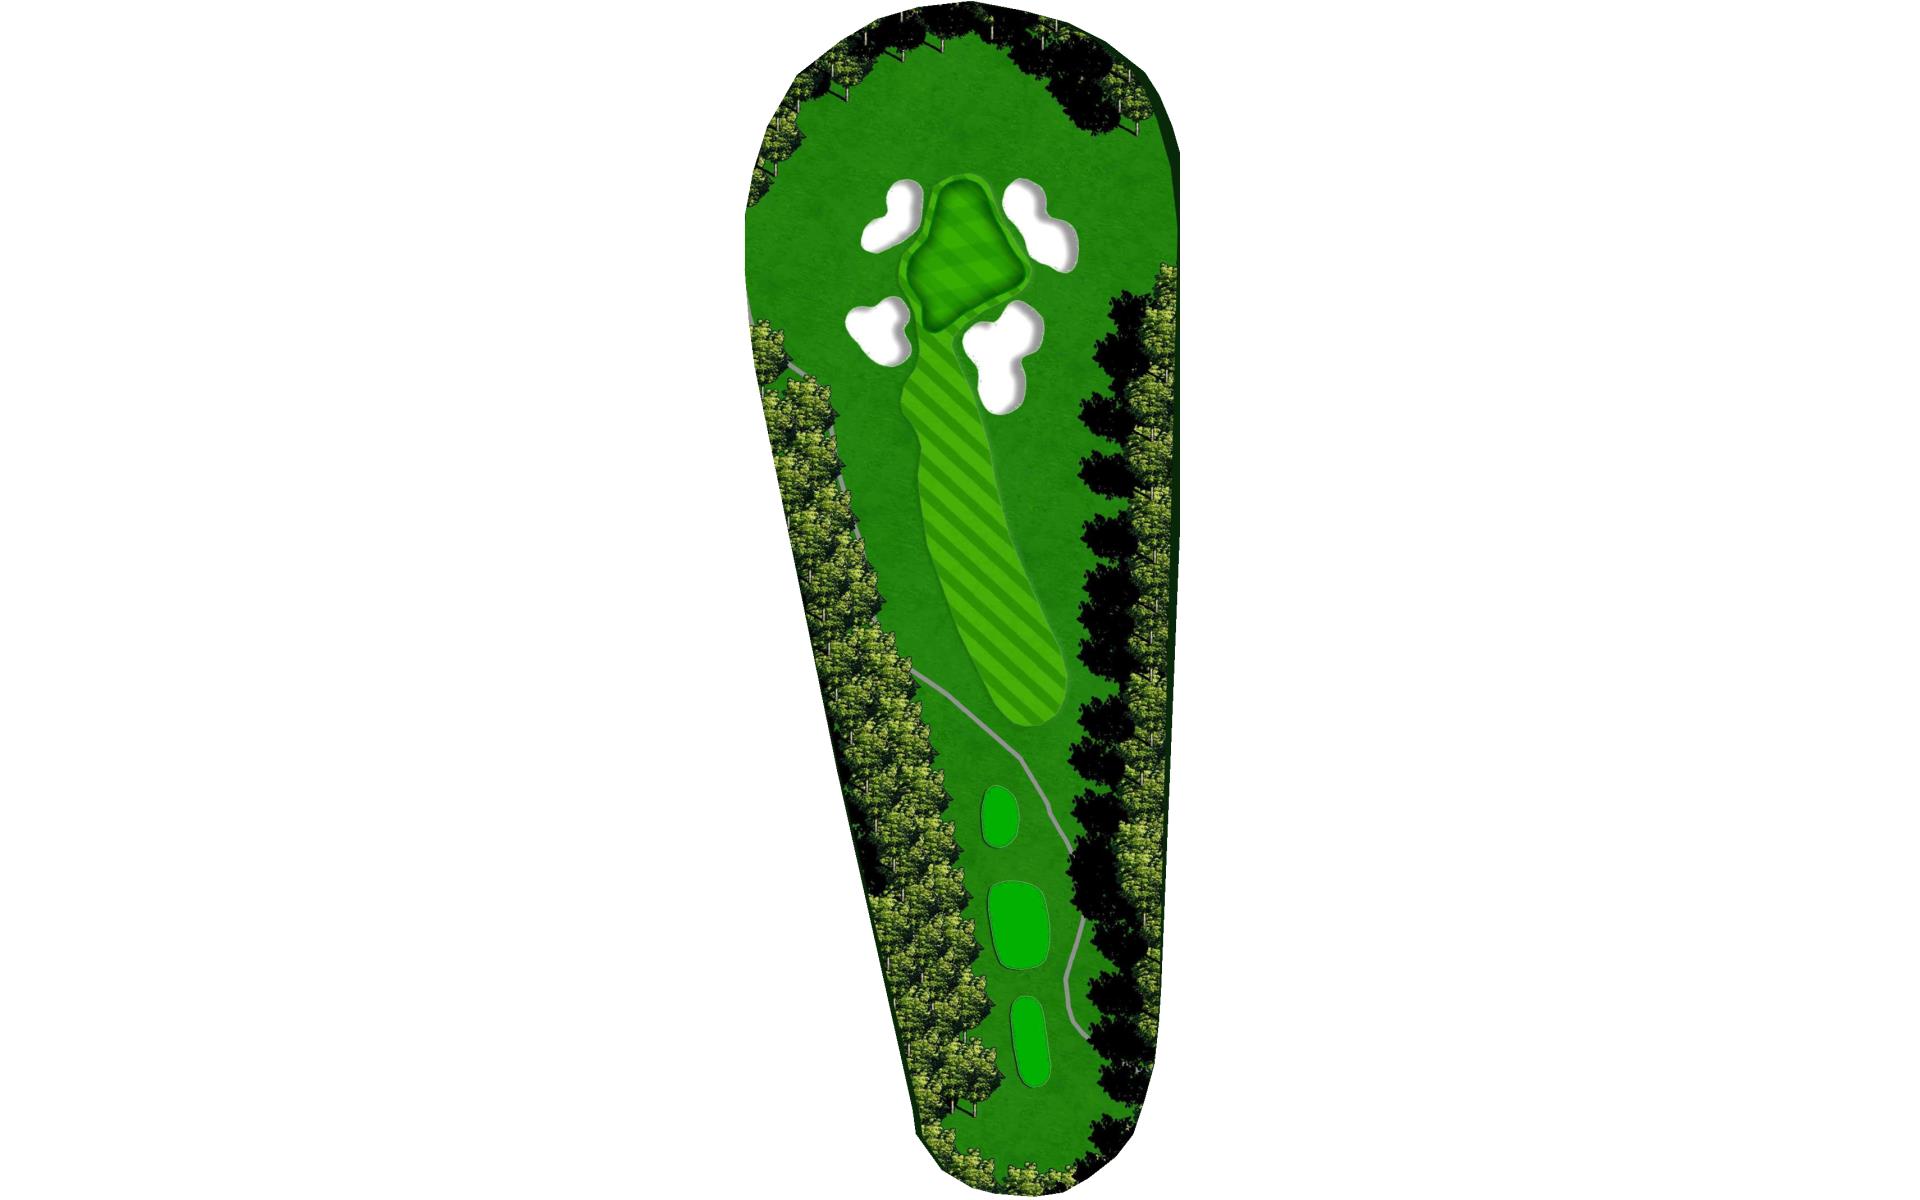
# 3 / Hole #3
Par: 4
Yardage by Tee:
BLACK 358
BLUE 343
GOLD 286
RED 277
WHITE 328
GREEN 286
Pro Tips
Avoid the bunkers on this short par 4.

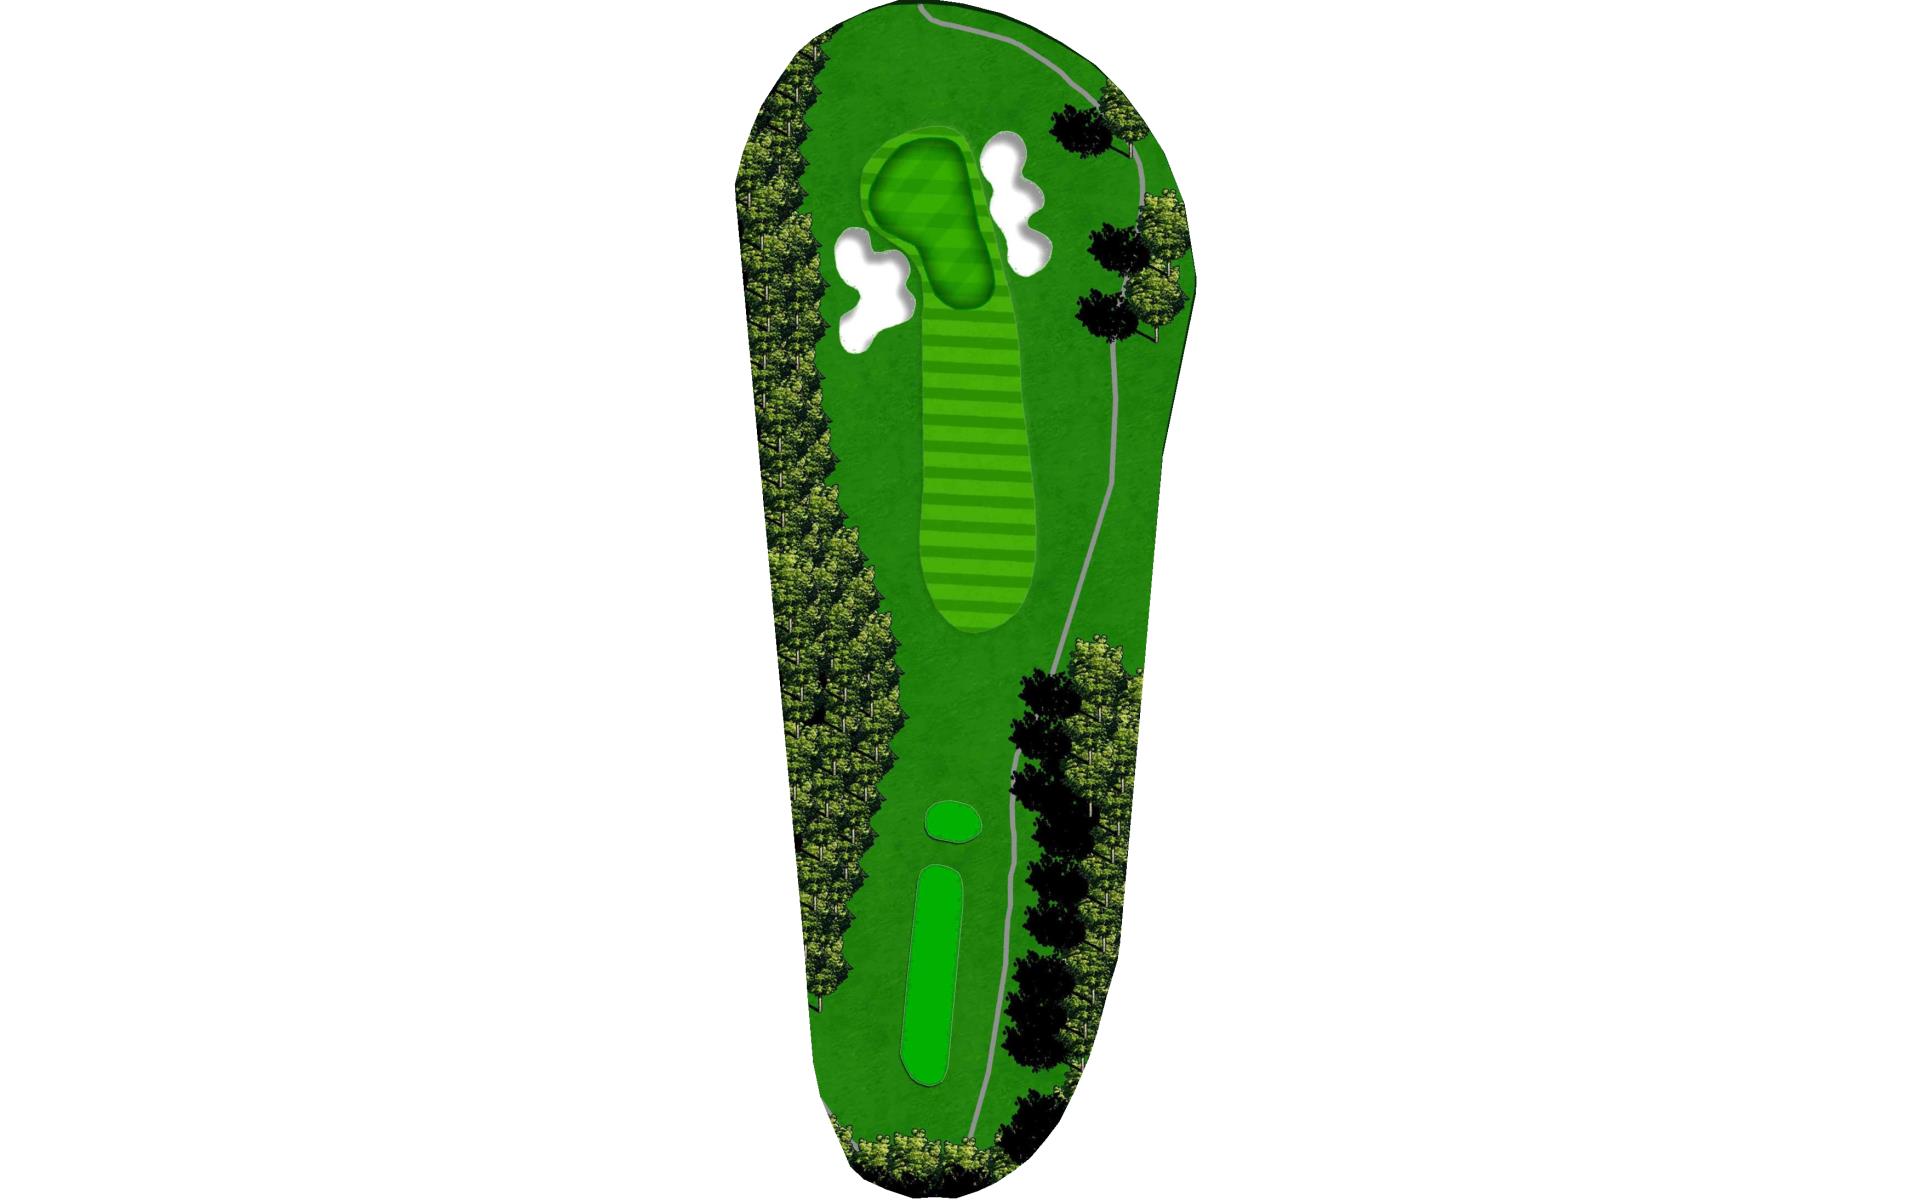
# 4 / Hole #4
Par: 3
Yardage by Tee:
BLACK 182
BLUE 169
GOLD 120
RED 115
WHITE 144
GREEN 144
Pro Tips
You’ll want to stay above the sloped green on this short par 3.
# 5 / Hole #5
Par: 4
Yardage by Tee:
BLACK 351
BLUE 335
GOLD 272
RED 225
WHITE 319
GREEN 319
Pro Tips
It’s all about the drive on this short par 4, with a green that’s protected by bunkers.It’s all about the drive on this short par 4, with a green that’s protected by bunkers.
# 6 / Hole #6
Par: 3
Yardage by Tee:
BLACK 188
BLUE 176
GOLD 137
RED 132
WHITE 160
GREEN 160
Pro Tips
Hit an extra club on this long par 3 with a large green that plays up hill.
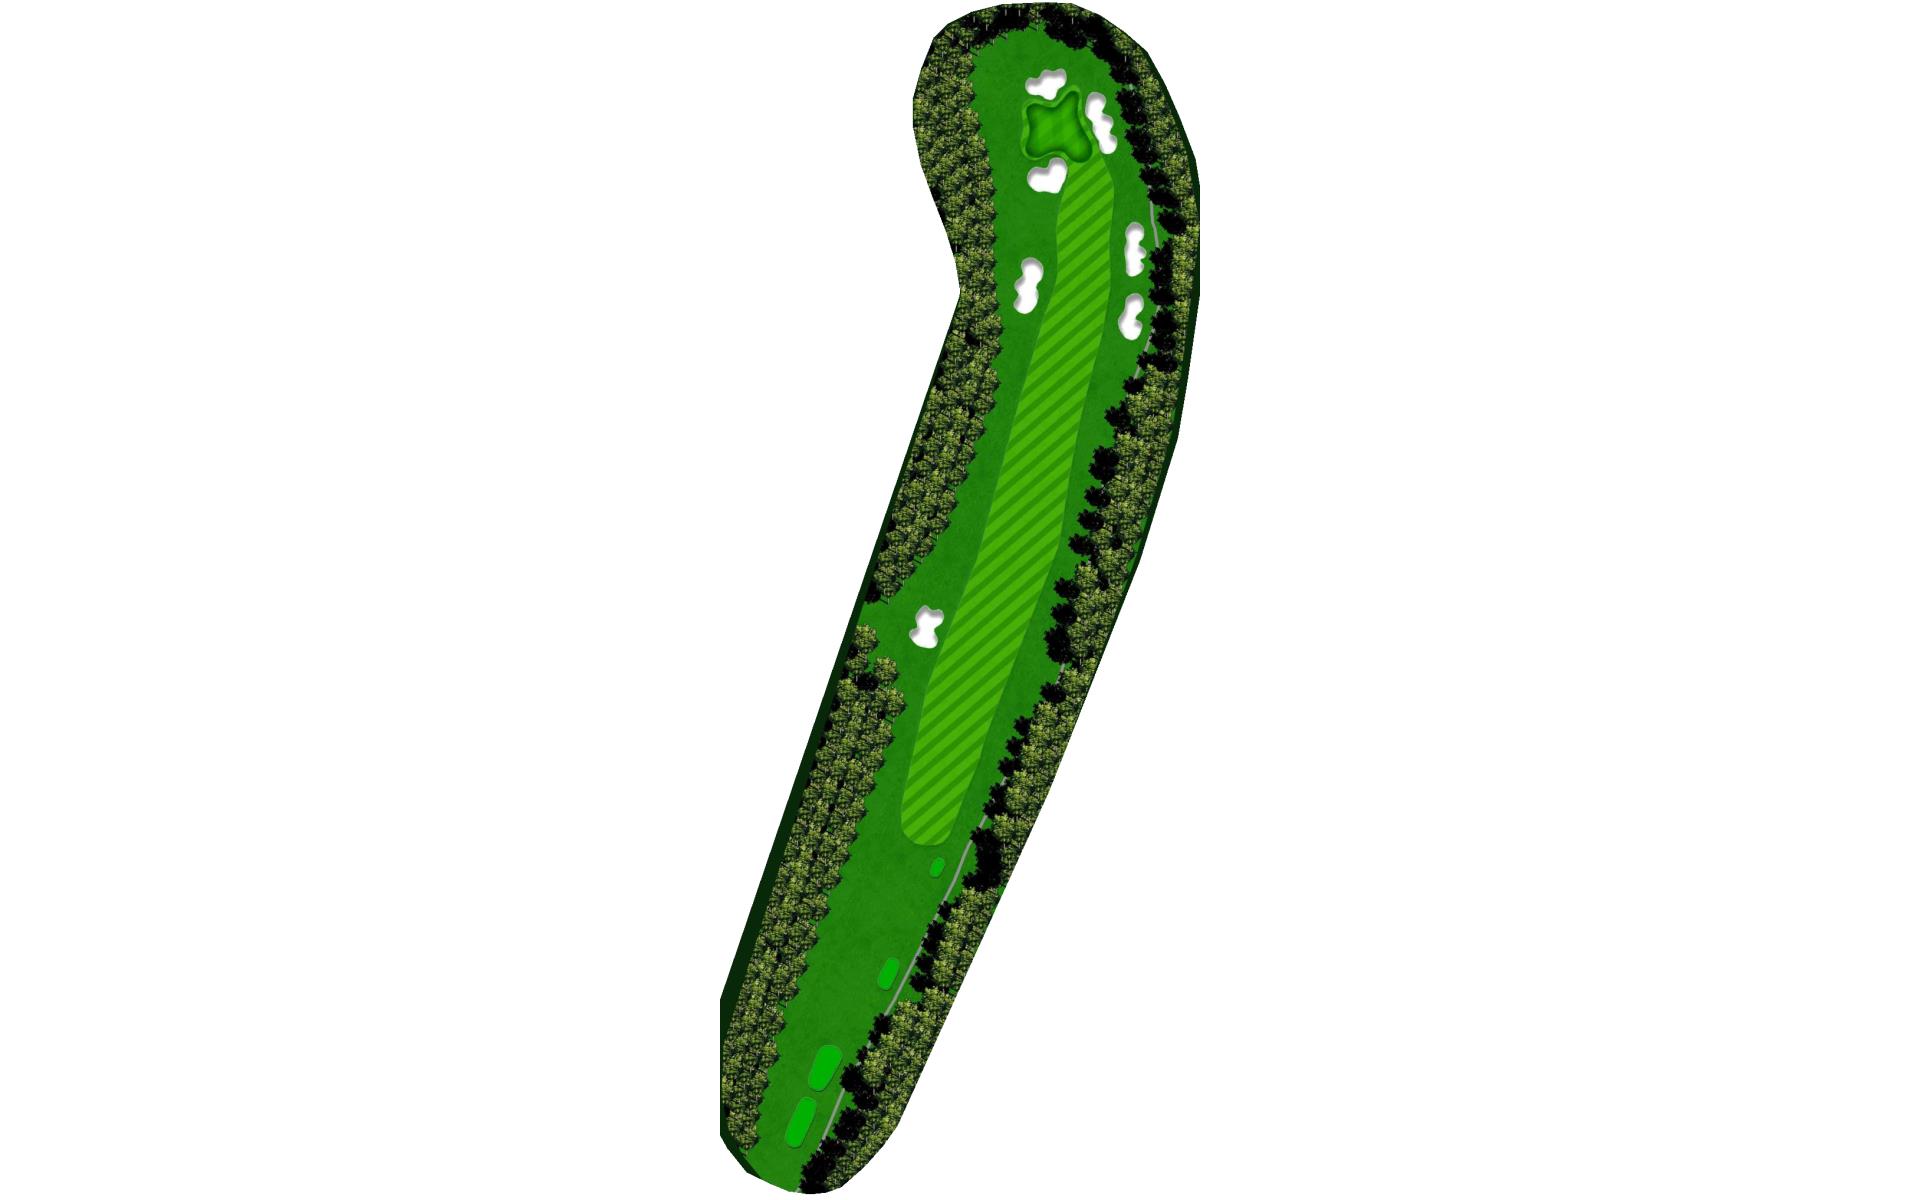
# 7 / Hole #7
Par: 5
Yardage by Tee:
BLACK 517
BLUE 493
GOLD 433
RED 375
WHITE 483
GREEN 433
Pro Tips
You’ll need to score on this short par 5.
# 8 / Hole #8
Par: 4
Yardage by Tee:
BLACK 415
BLUE 385
GOLD 279
RED 271
WHITE 359
GREEN 359
Pro Tips
This tough par 4 presents a difficult approach; keep it left and don’t go long.
# 9 / Hole #9
Par: 4
Yardage by Tee:
BLACK 394
BLUE 378
GOLD 318
RED 262
WHITE 362
GREEN 318
Pro Tips
This tough par 4 presents a difficult approach; keep it left and don’t go long.
# 10 / Hole #10
Par: 5
Yardage by Tee:
BLACK 512
BLUE 488
GOLD 446
RED 384
WHITE 478
GREEN 446
Pro Tips
A short dogleg right with a downhill approach. Keep in out of the fairway bunkers and you’re golden.
# 11 / Hole #11
Par: 3
Yardage by Tee:
BLACK 174
BLUE 159
GOLD 128
RED 124
WHITE 144
GREEN 144
Pro Tips
Play an extra club on this uphill par 3.
# 12 / Hole #12
Par: 4
Yardage by Tee:
BLACK 380
BLUE 351
GOLD 275
RED 263
WHITE 320
GREEN 320
Pro Tips
A short dogleg left. Keep it straight and you will score.
# 13 / Hole #13
Par: 4
Yardage by Tee:
BLACK 406
BLUE 390
GOLD 318
RED 312
WHITE 374
GREEN 318
Pro Tips
A long, slow dogleg to the right. Keep it to the left side of the fairway for the best approach.
# 14 / Hole #14
Par: 3
Yardage by Tee:
BLACK 184
BLUE 161
GOLD 130
RED 125
WHITE 152
GREEN 152
Pro Tips
Don’t go long and don’t go left on this slightly downhill par 3.
# 15 / Hole #15
Par: 4
Yardage by Tee:
BLACK 317
BLUE 302
GOLD 240
RED 229
WHITE 287
GREEN 240
Pro Tips
For this short par 4 with a green that’s guarded by water, don’t hit it long off the tee or you will be in the water.
# 16 / Hole #16
Par: 4
Yardage by Tee:
BLACK 369
BLUE 354
GOLD 297
RED 237
WHITE 339
GREEN 339
Pro Tips
A dogleg right with fairway bunkers. Beware: hard right is out of bounds.
# 17 / Hole #17
Par: 5
Yardage by Tee:
BLACK 544
BLUE 528
GOLD 439
RED 430
WHITE 512
GREEN 439
Pro Tips
A long par 5 with several fairway bunkers. Keep it in the fairway and you should score.
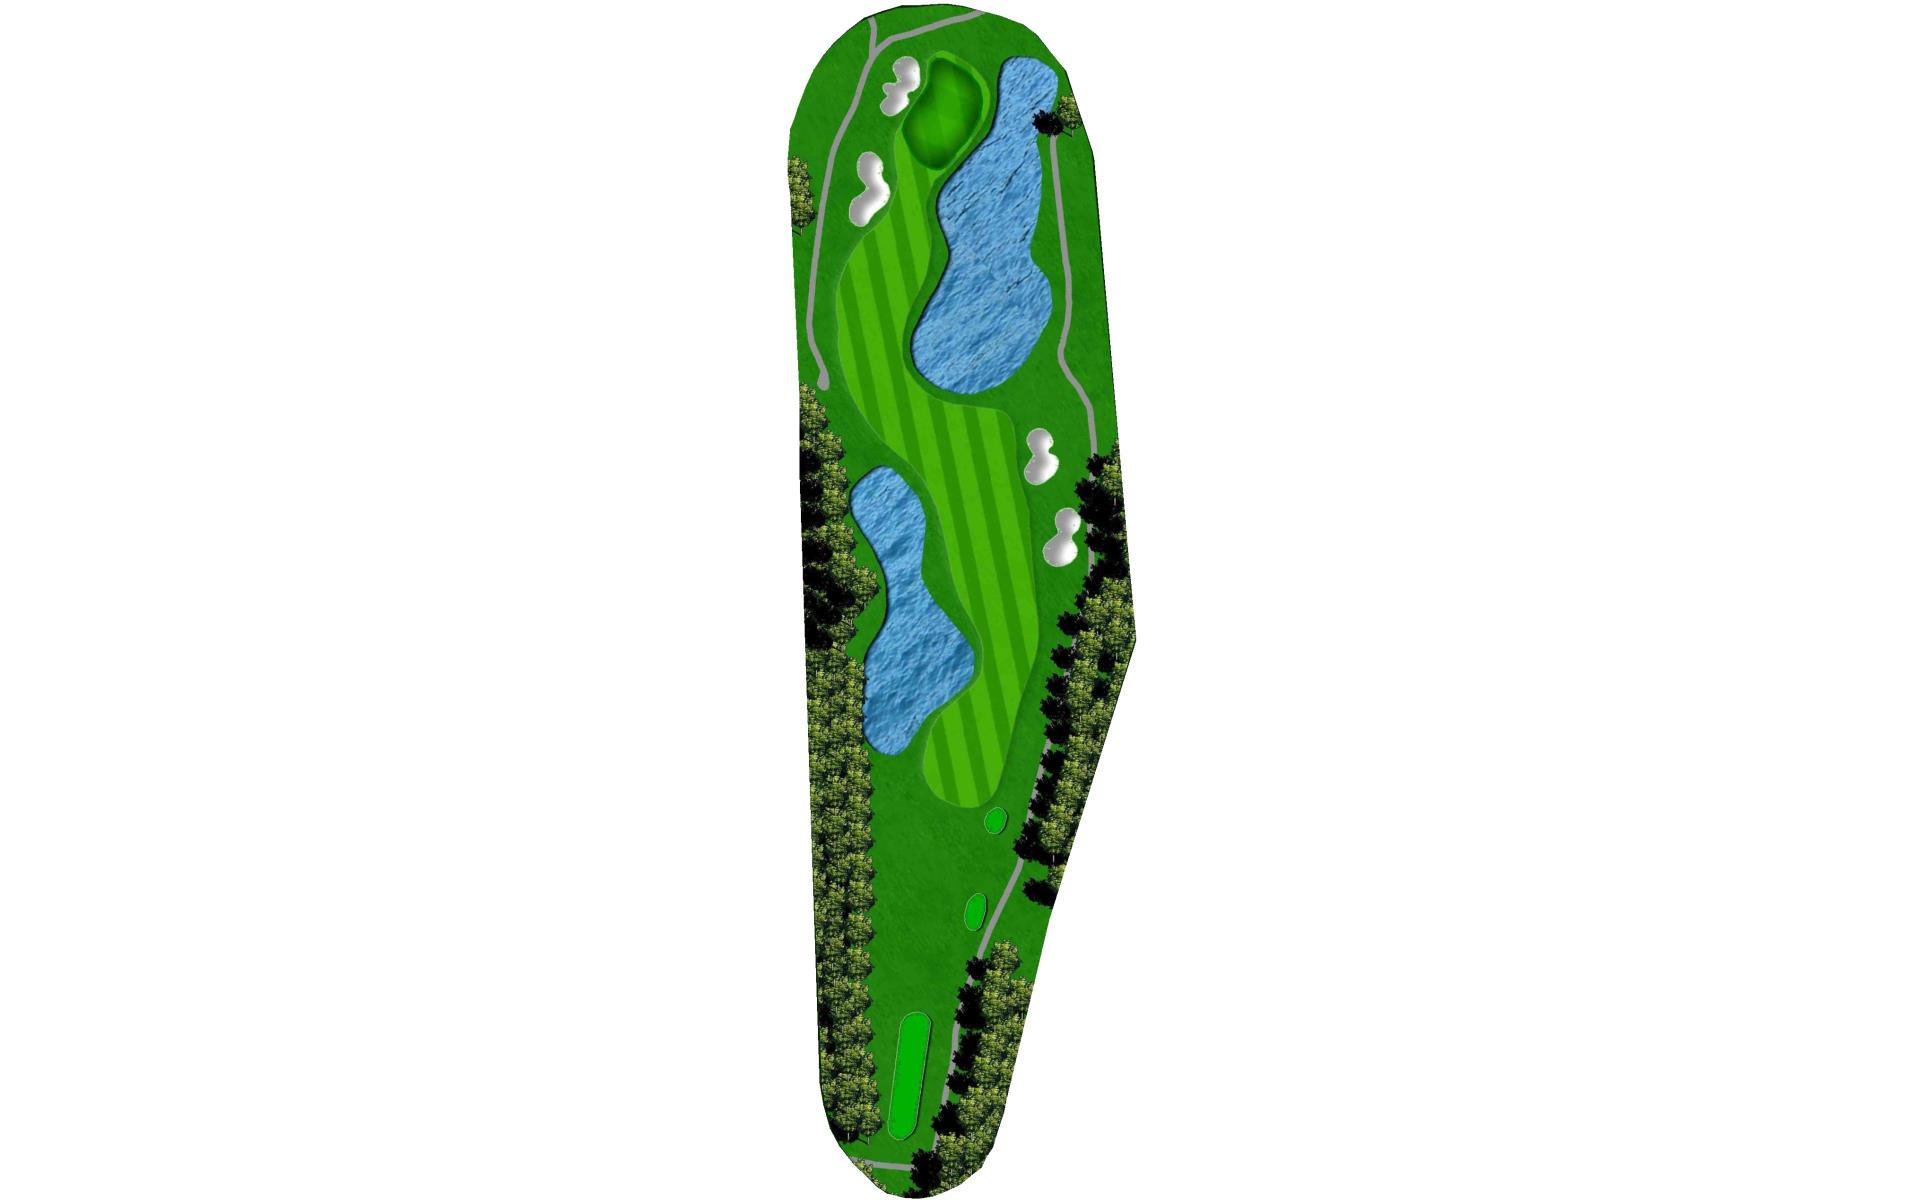
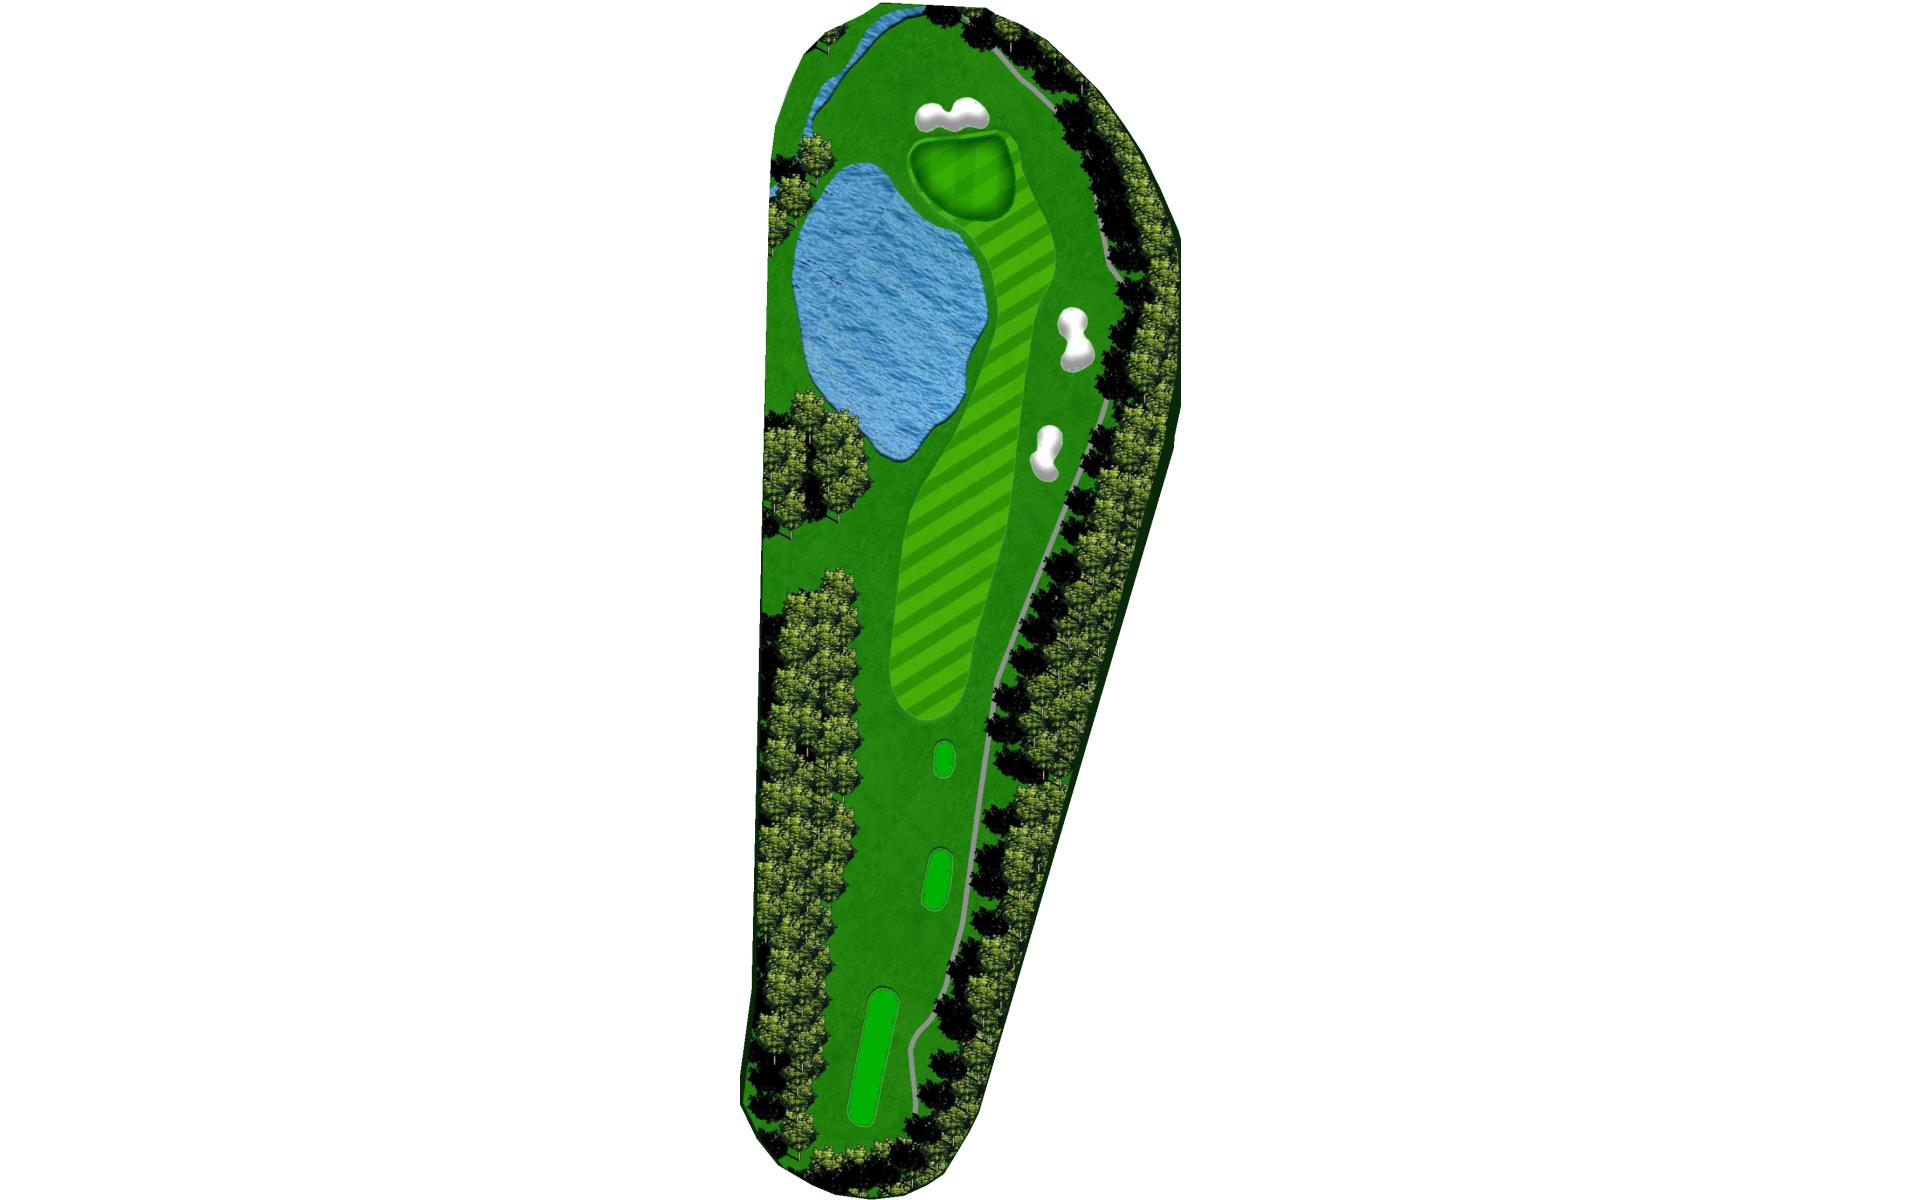
# 18 / Hole #18
Par: 4
Yardage by Tee:
BLACK 420
BLUE 404
GOLD 335
RED 299
WHITE 388
GREEN 339
Pro Tips
Our signature hole and the real No. 1 handicap. With two lakes - one off the tee and the other on the approach - you’ll need to keep it out of the water.